

Tips and Tricks to Make the Most of Community
How to Use the Toolbar When Posting
The toolbar is an editing tool that allows you to change the formatting of your posts in a variety of ways to make it easier to convey information. You can use it to change text alignment, add bulleted or numbered lists, insert tables and code samples, express yourself with emoticons, add images, and much more. This article will walk you through the process of using some of the toolbar features.
Expanding the toolbar
To see all options, select the three dots on the right to expand the toolbar.
Text formatting
- Text and font: Make common changes to your text, including italicizing, bolding, and • underlining.
- Paragraph: You can choose between using regular paragraph formatting or selecting an • either large or small heading size for your text.
- Alignment: Align your text in a variety of ways; left-aligned, centered, or right-aligned. •
- Lists: Create bulleted or numbered lists.
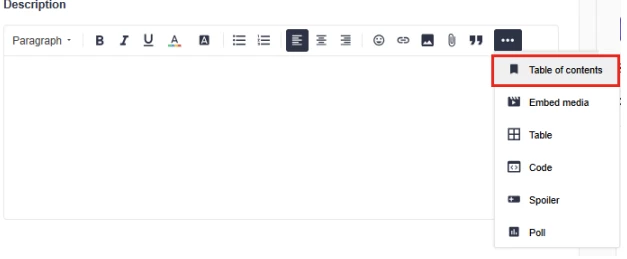
Table of contents
For longer pieces of content (such as tutorials) you have the option to create a table of contents. This will provide readers with clickable links for sections they would like to visit. To use the table of contents, first, click on the ellipsis at the top, then select the Table of Contents icon.
A pop-up will appear for confirmation of adding a Table of Contents to your post. By default, both small and large headings will be part of the Table of Contents. You can choose to have only large headings appear in your post by selecting the checkbox for Contain only large headings.
The Table of Contents will appear where your cursor was when you selected it from the toolbar.
To move the Table of Contents, hover over it until you see the cross arrows. Click and drag the Table of Contents to the desired location.
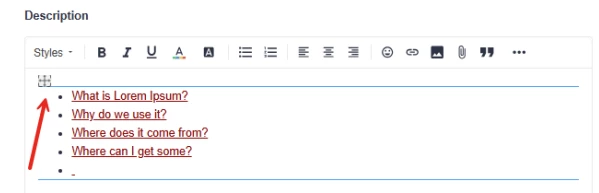
As additional headings are added to your post, the table of contents will update automatically.
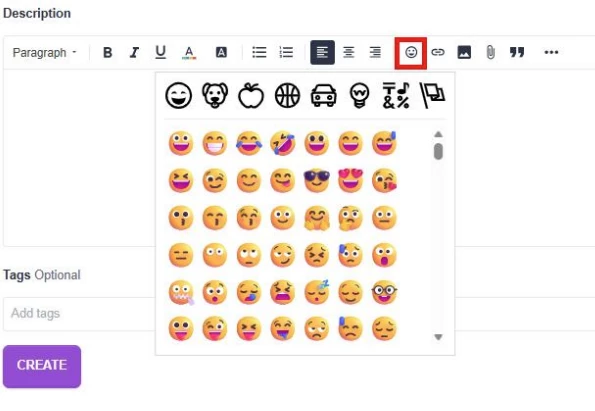
Emojis
Emojis (also known as “Emoticons”) are a quick way to convey how you feel, without using words. To insert an emoji, click on the 'Insert emoji' icon, then choose an emoticon from the list.
Inserting Images
Inserting images is a great way of illustrating steps to resolve an issue or to show screenshots of an issue that you're experiencing yourself. You can add images from your device, by copy/pasting or uploading images from your computer. There are multiple options for inserting an image. See each of the options and steps to do so below.
Copy/Paste
You can add an image to the text editor by simply copy/pasting. Right click an image and select "Copy," and then place your cursor in the text editor and right click and select "Paste." You can also use the shortcuts Ctrl+C to copy and Ctrl+V to paste (For Mac: Command+C to copy and Command+V to paste).
Upload
You can upload an image from your device by selecting the Insert Photos icon from the toolbar.
Then, you'll see a pop-up window that allows you to choose your image. To upload, select Open and your image will be added to the text editor.

Tables
You can also insert and edit tables. Expand the toolbar and select Table.
In the pop-up, enter the number of rows, columns and if the table needs headers
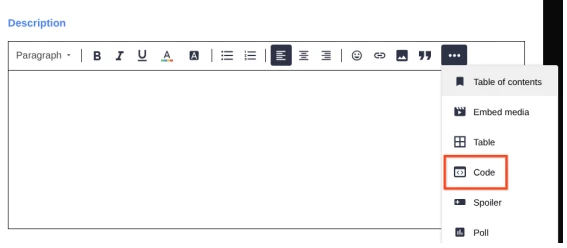
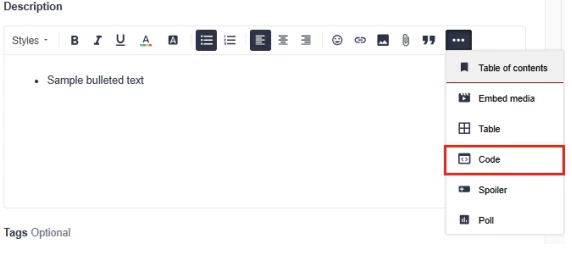
Code samples
You can also include code samples, such as the HTML code sample shown below. You can insert samples of code in Apache, Bash, C, C#, CSS, Diff, HTML, HTTP, INI, Java, JavaScript, JSON, Makefile, Markdown, Nginx, NQE, Objective-C, Perl, PowerShell, PHP, Python, Ruby, SQL, Swift, and VBScript.
You can also insert samples of code within a bulleted or numbered list with the following steps.
Bulleted list
- Click the bulleted list icon. A bullet will be inserted into the body of the text editor.
- To move your cursor to the next line without adding a new bullet, for Windows, click SHIFT+Enter, for Mac, click Shift+Return.
- Then, click the code sample icon from the text editor.
- Select the language, enter your code sample and click Add.
- Your code sample text will be inserted after your bulleted item in the text editor.
- To add additional bulleted items after your code, place your cursor to the right of the code sample and click Enter/Return. Your bulleted list will continue.
- Repeat the above steps to insert samples of code within a numbered list.
Attaching XML Files
The Community does not support direct upload of XML files. To share an XML file in a post, zip it first and attach the .zip file using the Attachments feature below the text editor. Other members can then download and unzip it.
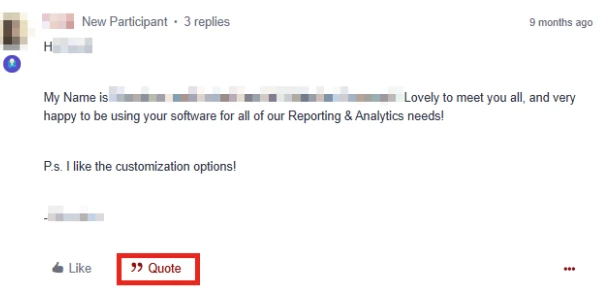
Quoting a Community Post
Quoting a community post enables users to quote content posted by other users in a thread and draft a response.
If you would like to quote another users post within a thread, click on the Quote icon below the content a user posted.
The post you have selected to Quote will appear in the reply box at the bottom of the thread.
Finish your message and select Send to publish.
Using @mentions
@mentions enable users to draw attention to other Community members within a post. This is helpful for responding to a forum topic when you want to include another Community member to provide some additional helpful information.
With User Mentions, users can tag specific users in their posts and invite them to join the conversation. You might @mention a user when you know they can answer a question or provide valuable insight into the topic discussed in a thread. It also ensures that the mentioned users see the post, when you want to thank them or give public praise.
For instance, let's say that you want to thank a user for their great answer to a question that you asked.
Using the Rich Text editor, enter the person's username, preceded by an "at" symbol (@). As you type, a pop-up menu appears with matching names. You can either continue typing the name or select a name from the suggested user list.
When you select or finish entering the name, the mentioned username is highlighted, as shown here:
When users are mentioned in posts, they receive a notification about being mentioned.
Troubleshooting Common Errors
If you encounter an error while using the Community, the following guidance covers the most common issues. For anything not listed here, submit a ticket in Service Now.
HTTP 401 Error
A 401 error typically means your OKTA session has timed out. Close your browser completely, open a new browser window, and log in again via OKTA. This usually resolves the issue.
Post Flooding Error
This error appears if you click Submit more than once on a post. It can also occur if a required tag was not added to the message — tags are required for certain post types. Check that all required fields are filled in before submitting again.
Access Denied Error
An Access Denied error means you have attempted to reach a part of the Community your account does not currently have access to. If you received an invitation to a restricted area, check your private messages or email for an acceptance link — you will need to accept the invite before access is granted.